
AWS CodeBuild is a service provided by AWS for all the project build requirements. it is a module which will be part of AWS CodePipeline service.
This below instructions are aimed for beginners and advance configurations are not covered, users are encouraged to explore while understanding the basics. be aware that for each build you will be billed for the resource you use please check the billing calculator.
Step 1:
Search for CodeBuild service in AWS web console and click on it.

Step 2:
select "create build project" for creating new build configuration

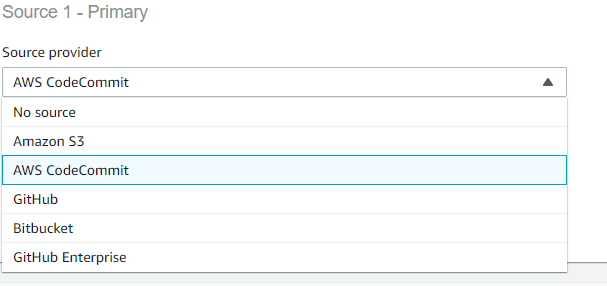
here you can enter the name for your project and also select the platform which contains your source code you want to build. available options are shown below.
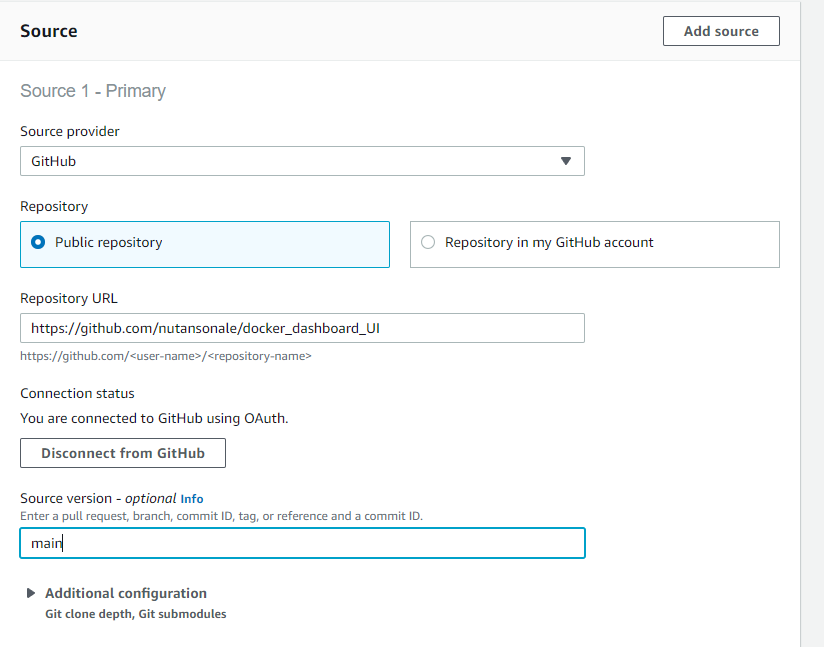
sample GitHub connection look something like below picture.
Step 3:
now we have to setup our environment to be used for our build

here we can either choose a AWS managed Docker images or our own images for the build. There are different version of images to select from
| Platform | Image identifier | Definition |
|---|---|---|
| Amazon Linux 2 | aws/codebuild/amazonlinux2-x86_64-standard:3.0 | al2/standard/3.0 |
| Amazon Linux 2 | aws/codebuild/amazonlinux2-x86_64-standard:4.0 | al2/standard/4.0 |
| Amazon Linux 2 | aws/codebuild/amazonlinux2-aarch64-standard:1.0 | al2/aarch64/standard/1.0 |
| Amazon Linux 2 | aws/codebuild/amazonlinux2-aarch64-standard:2.0 | al2/aarch64/standard/2.0 |
| Ubuntu 18.04 | aws/codebuild/standard:4.0 | ubuntu/standard/4.0 |
| Ubuntu 20.04 | aws/codebuild/standard:5.0 | ubuntu/standard/5.0 |
| Ubuntu 22.04 | aws/codebuild/standard:6.0 | ubuntu/standard/6.0 |
| Windows Server Core 2019 | aws/codebuild/windows-base:2019-1.0 | N/A |
| Windows Server Core 2019 | aws/codebuild/windows-base:2019-2.0 | N/A |
step 4:
adding the actual commands that are used for building and testing the code is added using the "buildspec.yml". this file can be added to source code directly or can be configure in the web console
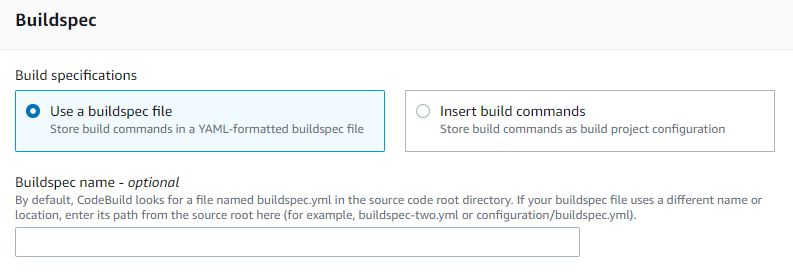
we can refer to the documentation of buildspec file in aws docs. a sample buildspec file looks like this
build:
commands:
- ls -al && mvn clean install
post_build:
on-failure: CONTINUE
commands:
- pwd
- mkdir ./artifacts
- find ./ -name \*SNAPSHOT.jar -exec cp -R -u -p "{}" ./artifacts \;
- find ./ -name \*SNAPSHOT.war -exec cp -R -u -p "{}" ./artifacts \;
- ls ./artifacts
artifacts:
files:
- 'artifacts/*'
discard-paths: no
step 5:
In above steps we have mentioned a step called artifacts, this step is responsible to recognize the files that are needed for deployment. to store these recognized artifacts we have to configure a stage in build project, instructing the place for storing the artifacts.
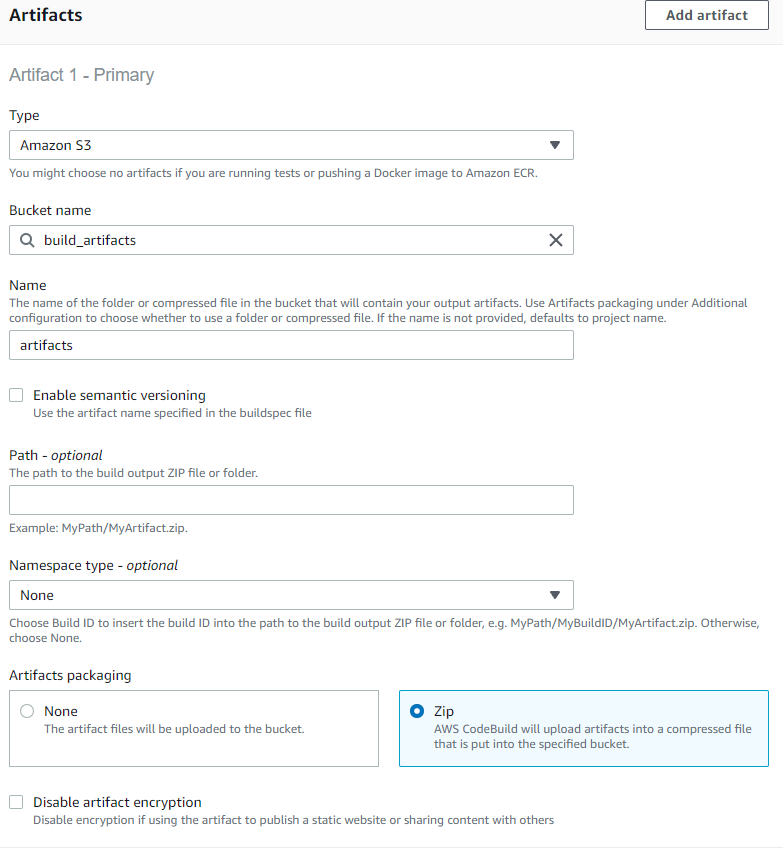
here we have configured to store the artifacts in AWS S3. Artifacts are stored in zip format as they are easy to handle and also its easy to deploy using AWS codedeploy service.
step 6:
for viewing the build logs there are two ways one is cloud watch and other is storing the logs on S3.

once all these configuration are in place we can click on "create build project" once project is saved successfully you can trigger the build. the build goes through all the below shown stages.

we can view the logs in Build logs tabs. also monitor the resource utilization tab for the resource usage for that build this has impact on your billing.

Happy learning!!😊
Comments
Post a Comment